


|
|


|
|
|
I will assume that you have experimented with compaction and basic sculpting skills at this point. If not, see "The Basics". This chapter will introduce you to a few new tools, and sculpting techniques. You will also learn more about compaction techniques that yield larger, more densely compacted blocks of sand. Many serious competitors and professional sand sculptors use this same compaction procedure in international competition. It produces blocks of compacted sand of virtually any size or shape.
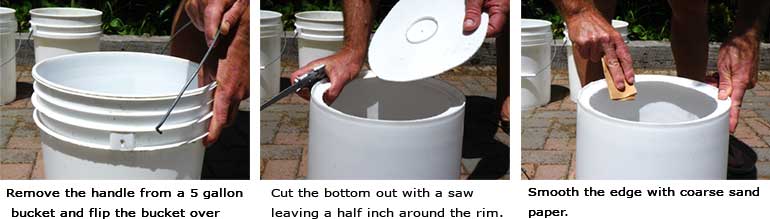
The Big Casting Bucket - For my money these forms are the most 'bang for the buck'. They are cheap and easy to make and allow you to pack up good size block of sand really quick. It is generally a two person operation to pack these forms.
For this method you will need a plastic trash-can. Rubbermaid Roughneck or Commercial, 33 gallon or larger is recommend. Trust me on this, thin, cheap trashcans or trashcans with horizontal ridges are a nightmare. A cheap trash-can will likely tear, mushroom out in the middle or the rim won't be strong enough for removal, a general waste of money.
All that is required to turn a garden variety trash-can into into a slick, instant form is to take a keyhole saw or a saber saw and cut the bottom out of it similar to the method detailed in the 'Casting Bucket' instructions. The only difference is the cut is about 1½" in from the edge (see image). Leaving this 1½" rim around the bottom is important. The form will hold its shape better, and, more importantly, it makes it a lot easier to remove the form from the compacted sand. That's it. These forms can last for years.
Materials:
2 Shovels - 2 are needed to remove the form.
Buckets - A few 5 gallon plastic buckets for water.
A Trash-can Form
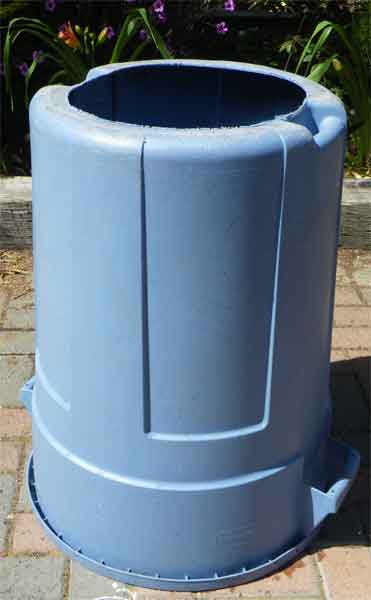
To pack a trash-can first flip it upside-down on the beach and check to make sure that the form is somewhat level. Have a few full buckets of water at the ready and shovel about 8" of sand into the form... And now someone has to climb into the form and pack down the sand with their feet. Make sure to pack the sand around in inside surface of the form. This will keep the water from leaking out later. Pour a couple of buckets of water in the form and whoever climbed into the form stays there, stomping around in circles. Try using your heels for a better pack. Continue to stomp around inside the form for a minute to make sure it's packed. Be sure that there is plenty of standing water in the form and that the person inside is stomping continuously while the other slowly shovels sand into it. Taking your time shoveling the sand into the form allows for a better pack. Stop when you are a couple of inches from the top of the form.
Removing a trash-can: You will need to experiment with removing the trash-can form. As Capt. Obvious would say, "different sands just behave differently". The procedure to removing a trash-can is to slip two shovels under the rim at trash-can handles, the strongest part of the rim, and push down on the shovel handles using them as levers to pry the trash-can off.
It usually helps to pour some water in the top before you start to remove a trash-can. Then - smack the trash-can all the way around the bottom 2 feet of of it with the flat face of the shovel about a dozen times, probably more. You may need to hit it hard. This takes the some of the pressure of the sand off trash-can, lessening the friction for removal.
Once the form is 3", or 4" up, you can usually both grab the rim on the top and pull it completely off. Now you have a compacted block ready to carve. With a little practice you can make one of these blocks from beginning to end in about 5 to 10 minutes. A nearly instant big block of sand to play with.
Lumber Form Construction: The following instructions describe construction of a small set of forms. Two foot tall forms are the standard in sand sculpture, they are comfortable to step up on and a sheet of plywood happens to be easily divisible by two. 5/8" CDX plywood is ideal, thinner plywood is too flexible - OSB can be used in a pinch but it tends not to last very long. The "stringers" made from construction grade (the cheap stuff) 2 X 4's.
These forms can be built into an infinite number of shapes. Squares, diamonds, hexagons, octagons, etc. In general, this type of form has an even number of sides, although, you can make forms with an odd number of sides with a little ingenuity. Other designs exist that allow for either odd or even numbers of sides, but they generally have serious limitations.
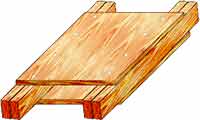
Download simple formwork plans here. Building these forms is simple, basic carpentry. Store and transport the forms with corresponding length innies and outies together (see fig.3)
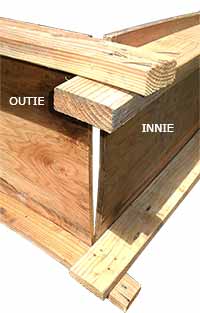
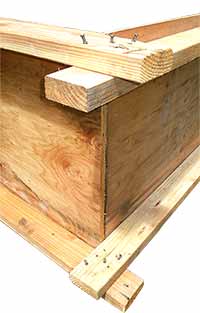
Form Assembly: For your first form start with four panels, two "innies", and two "outies" (see fig. 4). Outies are the panels with the stringers flush with the edge of the plywood. The next time that you go to the beach make sure to bring a claw hammer, 16d duplex nails and an 18" 2 X 4 scrap with your forms. When you get there simply nail the form together as shown in the illustrations below. Plywood always facing in, with alternating "innies", and "outies". I recommend "cross-nailing", angling two of the nails towards each other, as this helps prevent the stringers from separating during the compaction process.
Form panels can be connected in a number of different ways. We generally used duplex nails, they are cheap and easy to remove. Do not leave nails on the beach. For that matter don't leave anything on the beach but sculpture.
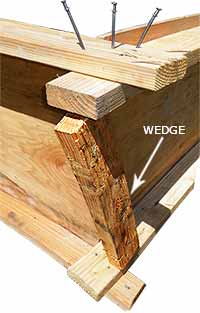
For smaller forms three 16d duplex nails per corner is sufficient. It is a good practice use a wedge, an 18 inch section of 2 X 4, to tighten up the top corner when nailing it (fig. 5). Then simply knock the wedge out and nail up the bottom corner. Once all four panels are nailed up you are ready to fill and compact the form.
Filling and compacting forms:
Materials:
Forms - And: claw hammer, 16d duplex nails and an 18" section of 2 X 4
Buckets - A few 5 gallon plastic buckets for water
Tamper - optional, but highly recommended
Shovels
A word about tampers: Simply put, using a tamper will compact the sand much better than any other manual method. Inexpensive tampers can either be bought pre-made (fig. 7), or easily constructed from a variety of materials. A block of wood with a simple pole, a metal plate welded to a steel pipe, etc. Old truck axles make great tampers, and can be picked up cheap at any salvage yard. They should be about 4½" to 5' tall, and weigh about 10 to 30 lbs. Lighter ones just don't seem to compact nearly as well, and heavier ones don't seem to compact much better and are a lot more work. The plate or surface on the bottom of the tamper Should be about 6" to 8" across.
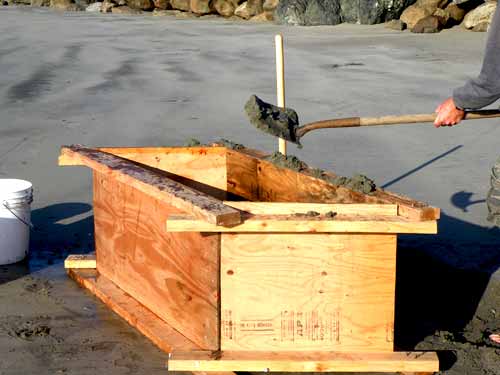
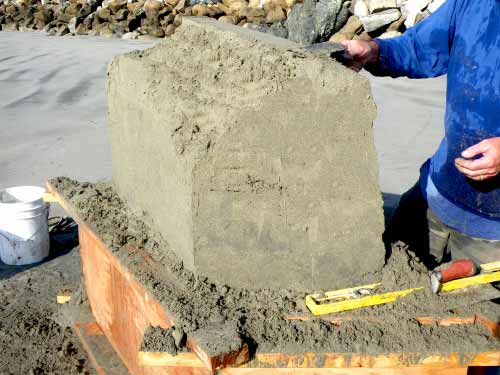
Like all forms these forms are filled and compacted in layers. Put the form where you want it and level it. Shovel about 8" of sand into the form. Step inside the form and level out the sand. Leave the sand in the corner a little high. This prevents water from rushing out the gaps between plywood in the corners.
You are now ready to compact the sand. If you chose not to build a tamper you may fill this form and compact it with your feet. The person inside the form should be stomping continuously, and using lots of water as others shovel sand into the form. This method works, but is not nearly as effective as using a tamper.
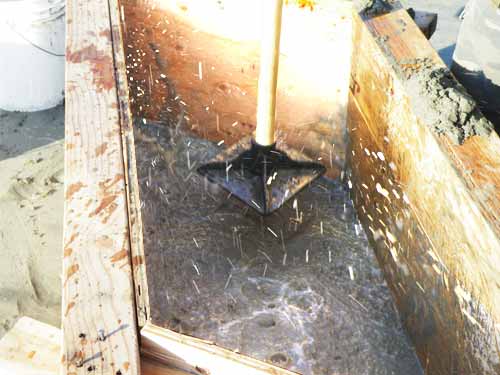
For those who have a tamper - Throw a few buckets of water in the form and use your hand tamper to pack the sand down. When you compact with a tamper, try to make sure that there is a little water on the surface of the sand. Tamp the entire surface of the sand in the form. Hit the sand hard - It makes a difference. Some sands compact so tightly that you hardly have to add much water after a few layers are compacted and if the sand is fine enough the act of tamping can actually pump water up through the sand. Repeat this process until the form is full. It's best to do at least 4 layers in a 2 foot high form. When you to top off a form, you usually have to shovel a few inches of sand on top higher than the top of the form, as you lose a few inches after tamping. That's all there is to it.
Smaller forms can be stacked on top of this "base form". These can be filled and compacted in the same manner for added height. The quality of the sand you are working in determines how steep your form-work can be. Start out with forms that steps in at least 1' at each new level. You may be able to go steeper, but first get used to the sand, and working with forms.
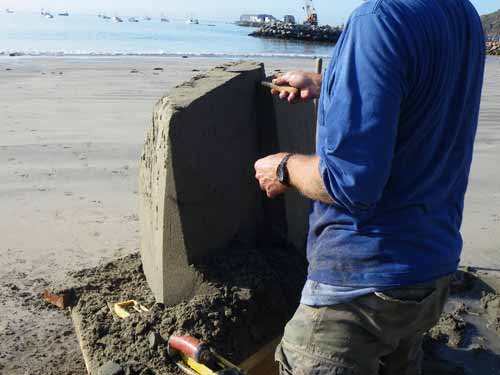
To remove a form you simply remove the duplex nails with your claw hammer. I typically remove all of the nails on a form except one in each corner. I then choose a corner and pull the top nail, pulling the nail slowly. There can be a lot of pressure on these forms and yanking them out fast can "shock" the sand. Shock can result in fractures in the block of sand and possible problems down the road. Once the top of the form is released slowly pull the bottom nail and completely release the entire form. Remove all of the remaining nails and stack the panels out of the way.
If you have several levels of form work, you use the lower forms as scaffolding for the higher forms. The top form is removed and you begin sculpting while standing on the lower forms. Just continue this process of removing and sculpting each level until you are "out of the woods", all the forms are removed.
Two things on a safety note: It's a good idea to keep the area around the form-work clear of any shovels, form panels, etc. If you lose your balance and have to jump off the form, you don't want to land on anything harder than sand. Also, if you have to stand on a stringer, it's a good practice to stand only on "Outies" when you're up on the form-work. Standing on "Innies" can push these stringers down, and weaken, or pull the connection between the stringers apart.
A few more helpful tools for this chapter:
Finishing trowel - Get the 'plaster' model, NOT the 'concrete' model (slightly curved blade). Ideal for any large relatively flat surface.
Level: - A 24" level such as THIS
Sculpting shovel - A small shovel for quickly 'blocking out' large shapes.
If you plan on carving architecture, get a spirit level. Use it at least until you have trained your eye to see plumb and level. Levels also make handy straight edges that can be used to help flatten out large areas. Architecture has a more polished look if the walls are plumb, and the windows and roof lines are level - unless you are going for the rustic look. Get the cheap plastic, or aluminum type. A 24" level, and the "torpedo" level (without the magnet) are the most commonly used.
One trap to watch out for: Whittling - This is the process of carving by making many small cuts, a practice that is fine if you sculpting for fun or as a hobby, but can be a severe handicap if you are considering going into competition. Be bold with your cuts. Always use the biggest tool that can accomplish the job, and try to cut the finished surface in one cut if possible. Don't forget that many times the best tool for the job can be a shovel. As a sculpting medium sand's greatest benefit is speed. Take advantage of this fact and you will be able to produce larger, more complicated, and more complete sculptures.
Plan the locations of where to dig in the beach hard-pack when filling your forms. It makes sense to "kill two birds with one stone" whenever possible. For instance: If you were planing a Peter Pan sculpture it would save both time and effort to leave the rough shape of a large alligator in the beach hard-pack when you are digging sand to fill your forms. Set your form and outline a rough alligator on the beach with your shovel, then simply dig around it leaving the alligator shape untouched and ready for sculpting later. Planning site like this adds dimension to the design and saves the time and effort of separately packing up the element you cut out of the hard-pack.
On a similar note, try to plan where the waste sand generated from sculpting is going to go. If you intend to build up a spot later, say, once the forms are removed, it makes sense to direct the waste sand toward that spot as you carve. Another handy trick is to literally dig a hole and fill it. At some point you will get into a situation where you will be sculpting in a confined area and the waste sand is filling up the area and getting in your way. It is often helpful to grab a shovel and dig a hole in these areas giving the waste sand somewhere to go and just disappear.
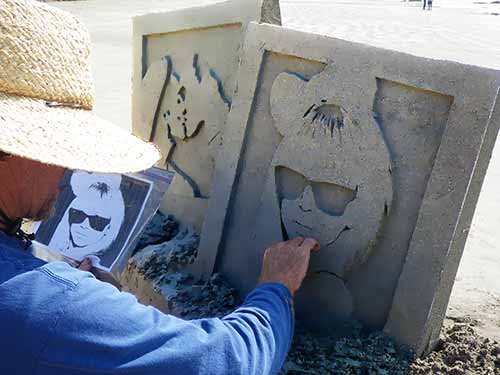
Since sand is monochromatic using texture is key. Light and shadow is all that you get to work with so make the most of it. Forks, brushes, spray-bottles and basic tools can create quick effective textures. Use them and be amazed.

Hands - Using tools to sculpt has it's advantages, but many times sculptors get so wrapped up in using tools that they forget to use the most flexible tools of all - Our hands. For establishing curved shapes, and for many other sculpting procedures hands are an important tool. Don't forget them.
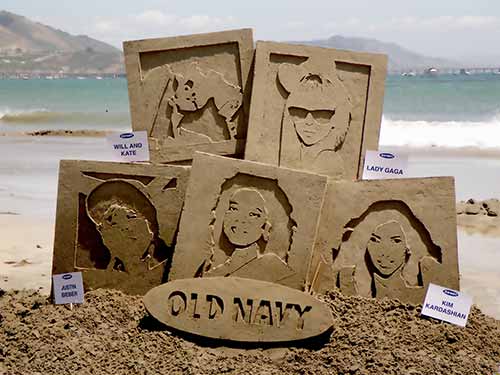
And remember, learn what you can from a particular subject then move onto a new subject matter. Varying your subject matter will help you in the long run. It will keep sand sculpture stimulating for you, and things you learn while sculpting in one subject matter, will help you with the others.
|
(Sitemap)
©Sandscapes 2011 |
|
|
|